
iPhone smartphones are famous for their camera quality. In order to upload your pictures to a computer running Windows OS, you will need to do the following.
Connecting iPhone to the USB port of a PC or laptop using the USB cable usually included.
After some short time automatically drivers will be installed and the device will be detected.
There are 2 ways to reset photos.
First - click on icon smartphone with the right key and select “ Importing images and videos».

In the window that opens, take your time to import your files. First of all, open Extra options.
Here follows tune the directory where the photos will be uploaded. 
In the next window you can put away checkboxes from those photos that do not need to be transferred to the PC, then click Import.
Photos are saved to the directory of your choice. 
Upon completion of the procedure, the folder is automatically will open.
Second way - open subfolders by double-left-clicking on the phone icon. Usually images are saved in a folder called DCIM. 
We simply copy the necessary images from there, selecting them and copying them to the PC. 
Transfer photos to MacOS
Connect the iPhone to the PC and open Spotlight in the upper right corner of the screen, or using the combination “ Ctrl+Space». 
We need a utility Image Capture. Enter its name in the search. 
In the window that opens, you will see a list of your photos and videos from your iPhone. 
You can import all at once by pressing the appropriate button. Or by left-clicking only the files you need.
Select folder, where the files will be imported. 
We recommend that you uncheck the “ Delete after import"If you don't do this, all the files you imported will be deleted from your iPhone. 
Using iTunes
iTunes has the option tune photo synchronization using the program " Photo"or from a directory on your PC. When syncing your iPhone with iTunes, photos and videos on your iOS gadget are updated according to the content of albums on PC.
Launch the iTunes interface window, click on the smartphone icon.
Then go to the section Photo.
Check the box " Synchronize».
Select a directory or software as a source for synchronization.
If a directory contains subfolders, their top level will be displayed on the device as albums. 
Then press the button " Synchronize" and wait for this process to complete. 
You can connect the device either using a wire or via a wireless Wi-Fi network. To do this, before you start transferring photos, you will need to make synchronization via Wi-Fi.
In iTunes under " Devices» select your iPhone. Further in the section Review in field Options check the corresponding box. 
Start synchronization from your smartphone using Device settings. On the menu " Basic» check « Sync with iTunes over Wi-Fi"—after this the device will be automatically synchronize with a computer or laptop via Wi-Fi if they are on the same network. 
Transfer via cloud storage
You can view your photos in iCloud (and you can save more than just photos) without using your iPhone.
Install the iCloud utility on your PC. Installation is simple, similar to most other programs. Once launched, click on the item in the upper right corner - Recover from iCloud Backup File.
Enter your Apple ID and password, then click the arrow next to the password input field. 
After checking the correctness of the entered information, the program will provide backup copies that were linked to your account. Download the desired one by clicking Download next to it. 
After downloading, you will have the opportunity to view the entire amount of data, including photos. 
To restore the photo, click right click by the directory containing them and select Recover checker, which will restore all files.
This method will work if at least one backup copy is stored in the cloud.
We send it via mail
To send photos from your Apple gadget, you can use email; of course, for this, it must be configured on your iPhone.
Go to the application " Photo» and select the desired photo.
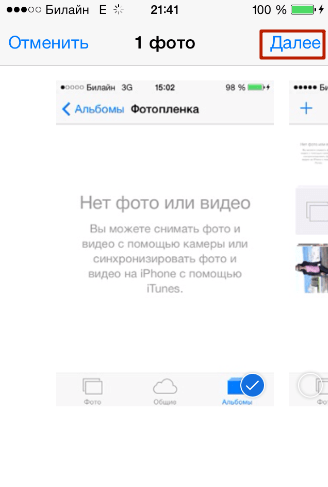
Click click on the arrow icon in the lower left corner, and then Further.


There you will see an icon called “ Mail" by clicking on her photo will attach to an email. 
At the next stage, enter your email address where the letter will be sent.

Click the button Send", then on your computer you can easily download the attached files by opening the corresponding letter.
In the same way, you can attach a photo file to a message from one of the social networks you use (VKontakte, Facebook, etc.). Then, with your profile open on your computer, download the images to your hard drive.
To free up device memory, files must be transferred to another type of storage. It is more difficult to download photos from iPhones to a PC due to the individual nature of the operating system. The instructions below offer several ways to clear your phone memory by freeing up the built-in storage. This way, data will be transferred from iPhone using five main methods. Each of them will be optimal for different types of Apple devices.
USB connection via cord
The method suggests transferring files from your iPhone to your PC. To do this, you need to use a USB cable from the charger. When connected to a computer, a standard window will pop up that appears when connecting similar devices.Select the file viewing function and get to the phone menu. One or more folder disks are presented. To download photos from an iPhone, you need to select the files that you want to save on your hard drive. Remove the cord through the “safely remove hardware” button in the lower right corner of the computer.

Important! Copying photos in this way is only possible “one way”, and downloading them back to the phone, as on Android OS, will not work.
iTunes Assistant
There is an iTunes program to sync with your Apple device. The download occurs from the official website https://www.apple.com/ru/itunes/download/, after which the installer package.exe is launched. The user's language is also selected there. After opening the program, connect the device via USB cable. The program will ask for access permission - answer with consent on your phone.
After detecting the phone, click on its icon (in the top panel) and in the menu on the left, select the items in the settings section that you want to download.

A reminder will appear that will tell you where to save the pictures from your phone.

The website https://support.apple.com/ru-ru/ offers detailed information. From here, install iCloud Music Library. You will need it to import data, and you can also transfer it using another PC option. It has several nuances, depending on the version of Windows.

Folder data will appear in the central area. You can select multiple pictures or upload them in folders. They appear on your phone as permanent photos in “From My Computer.” You can delete them by canceling synchronization, unchecking the box next to this action, or by uploading an empty folder to your iPhone. It will not be reflected in the photo library.

If you need to copy documents or other files, use iCloud Drive without syncing. To do this, go to the “shared files” section and select the ones you want to save by clicking “Add”. The adjacent window will display a list of documents. This way, you can copy data from your computer to your phone.
To transfer photos to your computer using the program, go to the photos tab. In the central window, specify the type of synchronization. The highlighted lines mean that the phone has already been connected to the program on another device, and synchronization with it has been established. When you connect again, all files will be displayed. The "apply" function means to enable the synchronization function with the selected options and download type.

When you reconnect, you must synchronize manually to transfer the necessary files to your computer. If iMedia Library is installed, the download is carried out in the background immediately after connecting the phone to the computer and launching the program.

By the way, you can listen to music in the program, even if it is not downloaded to your phone, but you once listened to it online, for example, through social networks. Each one from the library can be downloaded individually to your iPhone without purchasing it from the App Store.
Wi-Fi synchronization
This “one less cord” method is interesting for those who want to transfer files purchased from the App Store to other Apple devices. This method is also convenient for quickly copying photos. Install iTunes on the device you want to pair your phone with. Connect, in the menu on the left in the review item, select the type of synchronization via Wi-Fi.
FIRST sync your phone with your PC in response, and only then disconnect it. Apply the settings on your PC and disconnect from it. On iPhone, select photos to display on your computer. Next, observe the process of wireless synchronization when both devices are connected to the same Wi-Fi network.

Every time, just connect your phone to power, turn on iTunes and watch the automatic data transfer. If you disconnect the power supply, synchronization will continue: note the battery icon (it is not charging) and the sync icon (it is still there).

iCloud storage
Apple's own disk storage. You can log into your account at https://www.icloud.com by entering your Apple ID and password. They are the same as when you sign in to the App Store on your iPhone. In the phone settings, the top line will remind you of your login, and the password can be restored on your PC or reset via your phone. This method is convenient because, being anywhere in the world, you can show the landscape of your photos to your family who have access to your iCloud.
To transfer files, install iCloud by downloading it to your phone from the App Store. 5 GB storage available. Sync your phone with the drive or manually copy the pictures you need. All phone data will be displayed on the PC, and the gallery can be downloaded to your hard drive.
On the website, in the iCloud Drive and “Photos” tabs, you can view available files, upload pictures from your PC to the cloud, etc. In the iCloud “photos” section, you can view galleries taken by iPhone that have not yet been transferred to the cloud. The function works with a media library, which must be activated in the phone settings.
For those for whom the phone offers to buy additional storage, this is an important tip. Since it is impossible to delete downloaded pictures from the iPhone, they will have to be replaced with freshly downloaded ones. Therefore, the storage is constantly increasing and transferring data from the phone is not possible. Particularly cunning users upload empty folders through synchronization, with no images inside. On the phone they are also empty and take up only 13 KB, which is optimal for working with storage.
Yandex.Disk with unlimited space
This is virtual storage, like iCloud, only with expanded disk space. The disk must be linked to a mailbox. Download Yandex.Disk from the App Store, enter your email login and password. Open the storage and select photos to upload or select automatic synchronization, then all photos will be automatically uploaded to the Yandex virtual disk. You can create multiple folders for sorting.
It will be displayed on the phone as a mobile version of the browser. On your PC, go to mail and open disk storage. From there you can view and transfer photos from your iPhone to your computer. For example, the following image shows a screenshot of the moment the disk was installed on the phone. It was thrown into storage and viewed on a PC. Yes, there is no limit for your photos; upload at least two thousand to the cloud.

By the way, disk spaces can be switched between each other by moving your finger. If there are several of them, just swipe right or left from the screen.
The method and process for downloading pictures is affected by the software version, so make sure that the update is installed on your device and the latest version of the program is installed on your computer. When updating in parallel (connected from a PC), the phone will not be temporarily turned off. Some functions appear on the screen differently: synchronization may occur in the background, appear in iTunes, or not at all. It is also important to monitor previous actions - some devices do not support new versions of applications and conflict due to the OS.
It should be noted right away that you will definitely need a USB cable. As a rule, it is supplied with the device. The article will also show you how you can sync your phone or tablet with your computer. This will allow you to copy not only images, but also other content. So, next you will learn how to transfer photos from iPhone to computer.
Transferring ImagesAs already mentioned, you will definitely need a USB cable. If you don't have one, you can buy it anywhere that sells accessories for iPhones and other Apple devices. To transfer photos, you just need to connect the cable to your phone and computer. In this case, the operating system recognizes your device as a photo or video camera. And this will be enough to transfer your photos. If you need to copy other files or information, you will need to install additional drivers and software.

We have already looked at how to transfer photos from iPhone to computer, now let's learn how to copy other types of files. Apple devices are very popular all over the world. In this regard, many developers are creating more and more new software for various types of services. And there are many utilities to ensure synchronization of the device with the computer. But they still recommend using only official programs. For example, iTunes. This program provides transfer of such objects as: notes, ringtones, music, calendar events, videos, photos and much more. You can download iTunes completely free of charge from the official Apple website. But before use, you need to do some setup, described below.
Setting up iTunes
First, connect the USB cable to your computer and phone. When you hear the notification sound that a new device has been found, open iTunes. Here you should be in the "Media Library" mode. In the top right corner you will find the Device tab. Click on it and select your phone. When you want to synchronize, click on “Apply”.

additional information
For more convenient use of the iTunes utility, Apple iPhone owners are encouraged to transfer files via a wireless network. In this case, Wi-Fi will be used. You must have your own Wi-Fi router. The first connection is made using a USB cable. You won't need it further. The main condition for synchronization via Wi-Fi is being on the same network. The setup occurs in the same way as with a standard connection. In some cases, synchronization will not be possible if the phone or tablet is not connected to the charger. This restriction can be removed through the settings.
Conclusion
Synchronization allows you to expand the basic functionality and gain new capabilities. You can always save your data and be calm that it will not be “accidentally” deleted. We hope that now the question of how to transfer photos from iPhone to computer has been resolved for you.
Since the Apple iPhone does not allow you to expand the internal memory, many users have to periodically clean it of unnecessary information. As a rule, the photos that take up the most space on your phone are photos that can be deleted from the device by first transferring them to your computer.
Today we will talk about a variety of ways to transfer digital photos from your phone to your computer. Each of the presented solutions is simple and allows you to quickly cope with the task.
Method 1: Windows Explorer
First, let's talk about the standard method of transferring pictures from your phone to your computer. An important condition: iTunes must be installed on the computer (although it will not be needed in this case), and the phone must be paired with the computer (for this, the system will require you to enter a password code on the smartphone).

Method 2: Dropbox
Absolutely any cloud service is very convenient to use for exporting images from iPhone to computer and vice versa. Let's consider further actions using the Dropbox service as an example.


Method 3: Documents 6
Such a useful type of application as a file manager allows you not only to store and launch various types of files on your iPhone, but also to quickly access them on your computer. The method is suitable if both the iPhone and the computer are connected to the same Wi-Fi network.
- If you don't already have the Documents 6 app installed on your smartphone, download and install it for free from the App Store.
- Launch Documents. In the lower left corner, open the tab "Documentation" and then the folder "Photo".
- Click the ellipsis icon next to the image, and then select "Copy".
- An additional window will appear on the screen in which you will need to select which Documents folder the image will be copied to, and then complete the transfer. In this way, copy all the images that you want to transfer to your computer.
- Now you will need to enable Wi-Fi synchronization on your phone. To do this, click on the gear icon in the upper left corner, and then open the item "Wi-Fi Drive".
- Set the slider to about "Turn on" to the active position, and then pay attention to the URL that appears - this is where you will need to go in any web browser on your computer.
- When you click on the link on your computer, you will need to give permission on your phone to share information.
- On the computer itself, the folder where we transferred our photo will appear, and then the photo itself.
- By clicking on the file, the picture will open in full size and will be available for saving (right-click on it and select "Save image as").


Method 4: iCloud Drive
Perhaps the most convenient way to transfer images from an iPhone to a computer, since in this case, exporting images to the cloud will occur completely automatically.
- First, you should check whether photo uploading is active on your phone. To do this, open settings, then select your Apple ID at the top of the window.
- In a new window, open the section "iCloud".
- Select an item "Photo". In the new window, make sure that you have activated the items iCloud Photo Library, and "My photo stream".
- Download and install iCloud for Windows on your computer.
- A folder will appear in Windows Explorer iCloud Photos. In order for the folder to be updated with new photos, the program will need to be configured. Click on the arrow icon in the tray to open the list of running applications, right-click on iCloud, and then go to "Open iCloud Settings".
- Check the boxes next to the items iCloud Drive And "Photos". To the right of the second point, click on the button "Options".
- In the new window, put checkboxes next to the items iCloud Photo Library And "My photo stream". If necessary, change the default folders on your computer where pictures will be uploaded, and then click on the button "Ready".
- Make changes to the program by clicking on the button in the lower right corner "Apply" and close the window.
- After some time the folder iCloud Photos will begin to replenish with images. The download speed will depend on your internet connection and of course the size and number of images.


Method 5: iTools
If you are not satisfied with how iTunes works, this program has wonderful functional analogues, for example, iTools. This program, unlike software from Apple, is capable of transferring photos contained on the device to a computer in almost no time.


We hope that with our help you were able to choose the best way to transfer images from an Apple iPhone or other iOS device to your computer. If you have any questions, ask them in the comments.
In recent years, it has made tremendous progress: even the very first models of Apple smartphones took very decent pictures, but the latest ones are quite impressive with their photographic capabilities. What is the technology worth? Live photo, available on iPhone 6 and 6S?
However, for the outstanding quality of photos, users have to pay with the free memory of the gadget. A live photo alone weighs about 4 MB, and users bring hundreds of them back from vacation. iPhone owners every now and then have to transfer photo albums from the device’s memory to the computer. Fortunately, this is quite easy to do.
Users who frown in disgust at the word “ iTunes", should be happy with the fact that you can transfer photos from iPhone to computer without using this program. Actually, most iPhone owners use this method - no need to worry iTunes without good reason.
To download photos to your PC, you will need a USB cable. After you prepare it, follow the instructions:
Step 0 (preliminary)). Create a folder on your computer where you will send the photos and remember its location.
Step 1. Connect your smartphone to PC with a cable.
Step 2. Wait a few seconds for the computer to detect your iPhone. After you hear the sound characteristic of a USB connection, you can proceed further.
Step 3. Select the photos you want to download to your computer and drag them into a pre-prepared folder.
You can also transfer images to a Mac through other programs, for example, iPhoto or Aperture, however, this software is not built-in - it must be installed separately.
Uploading photos via iTunes
Transfer to computer via iTunes You can only use photos that were downloaded to the device’s memory in the same way. In the application " Photo» albums with such photographs are marked with the caption “ From my computer».
Camera photos cannot be exported via iTunes.
If necessary, send the photo back to your computer via iTunes proceed like this:
Step 1. After connecting your iPhone to your PC, run iTunes.
Step 2. Go to the gadget control menu - to do this, click on the icon with the image of a smartphone.

Step 3. In the block " Settings» select the tab « Photo».

Step 4. Make sure that opposite “ Synchronize" there was a tick. If it's not there, install it.

Step 5. In field "Copy photos from:" Press " new folder"(someone will have - " Images"). In the drop-down menu you need to select “ Select folder».

Step 6. Find the folder on your computer from which you downloaded photos to your iPhone’s memory and select it.
Step 7. Click the button Synchronize" and wait for the operation to complete.
There is another, unpopular way to get through iTunes photos stored on iPhone – extract from backup.
All local copies of data are stored in computer memory: for example, on Windows 7 they are located at Start usernameAppDataRoamingApple ComputerMobileSyncBackup, and on Mac - at usernameLibraryApplication SupportMobileSyncBackup. The backup copies in the computer folder look something like this:

To work with backups iTunes you need special software - say, a utility will do iPhone Backup Extractor, which you can download. The need to learn new software is the reason for the low popularity of this method.
Uploading photos via cloud storage
Use (such as Google Drive, Yandex.Disk, Dropbox) is the fastest option to transfer a large number of photos from your device to your computer. However, this method has a significant flaw: mobile applications of almost all cloud storage systems are installed only on iPhones with iOS versions older than 8. Owners of iPhones of the 4th modification will not be able to count on this method, because iOS 8 is not installed on iPhone 4 at all, but on 4S – works with a creak.
The method is very simple - let's look at an example Dropbox:

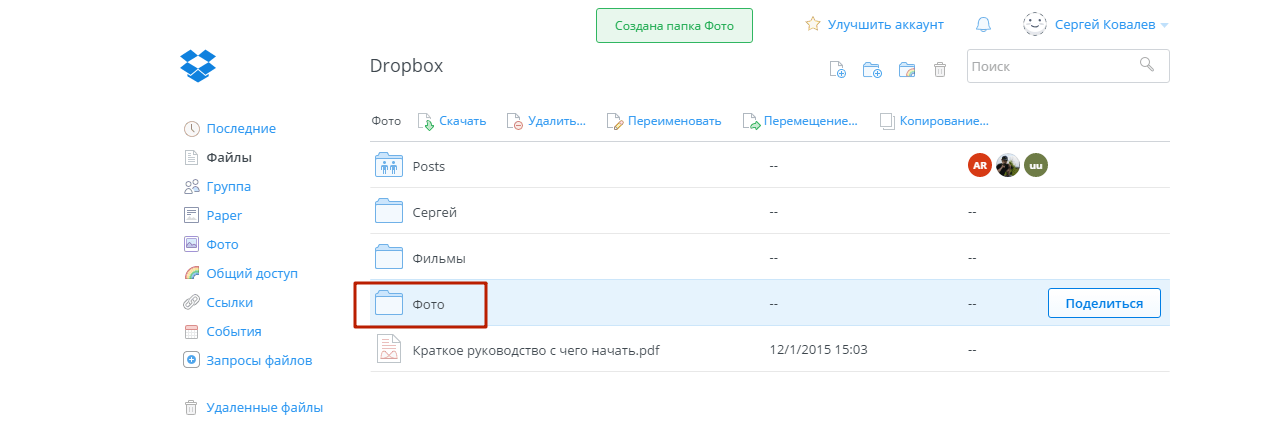
This should be the result:
Step 2. Download Dropbox from the App Store and log in with the same registration data.
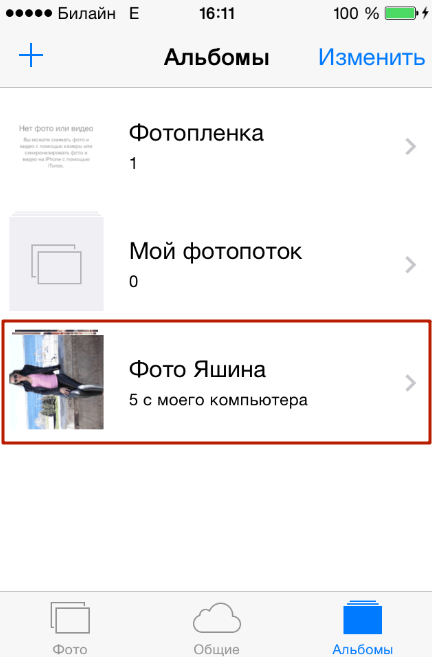
Step 3. Open the folder " Photo" in the mobile application and through the button " Download» Post photos there.
Step 4. Return to your computer and open the folder " Photo" On him. You will see that the iPhone photo is inside.
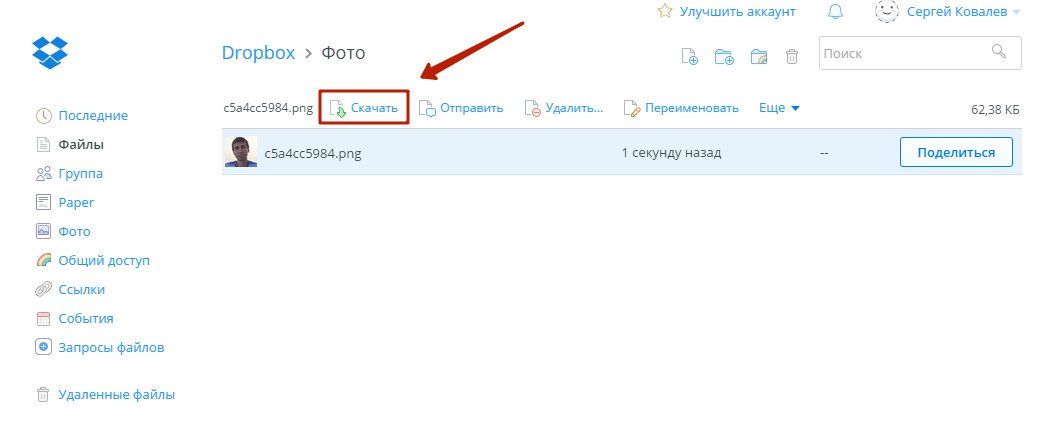
Step 5. Click the button Download" and wait a couple of seconds for the download to finish.
About cloud storage Google Drive And Dropbox is described in more detail. Users of devices with iOS 8.1 can consider the application as an “intermediary” iCloud Drive, which is installed on iPhones by default, however, this application has a significant disadvantage compared to other storage devices - there is very little free space.
Uploading photos via email and other methods
If you have email configured on your iPhone, you can transfer a photo to your computer in just a few simple steps:
Step 1. Go to the application " Photo» and find the photo you want.
Step 2. Click on the arrow icon located in the lower left corner.

Step 4. In the menu that appears, click on the “ Mail" A photo will be attached to the email.

Step 5. On the next screen, enter the email address to which you will send the letter. You can use a mailbox that belongs to you, but is registered on another service - it is now common for one person to have several mailboxes.

Step 6. Click " Send».
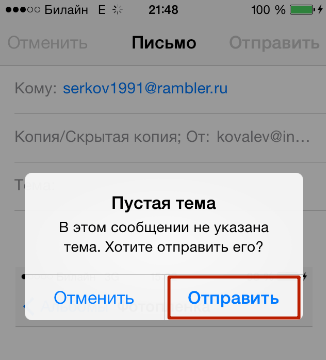
Step 7. A message will appear reminding you that you are sending an email without a subject - confirm your intention by clicking " Send».
Step 8. Go to the mailbox where you sent the photo from your computer and download the image.
In addition to email, you can use any of ( In contact with, Facebook): you just need to send an image via message from your smartphone, then open your message history on your computer and download the image to your hard drive. However, this method is only suitable if you need to download a small number of images - in one message " In contact with» a maximum of 10 photos can be placed.
Conclusion
Transferring photos and videos is the only operation related to the exchange of data between iPhone and computer that does not require launching iTunes. When connecting an Apple gadget via USB, the iPhone is detected as a digital camera, which allows the user to copy pictures from the device’s memory to the hard drive directly. However, even if there is no USB cable at hand, an iPhone user has a lot of options for how to transfer photos to a computer - to do this, he can use his email or social network account.